Place the Slab
-
Select the Place Slab tool.

The Place Slab tool settings window appears with a round section selected for placement.
-
You will need to change the slab type and some of the placement
options.
- Select Slab on Grade from the Catalog Selection drop list.
- In the Placement Options, select Boundary for the Place By option.
- In the Side Options, enter a value of 0:9 for the Overhang option. This will extend the edges of the slab from the Structural snaps points you will be selecting during placement.
- Enter a -0:2 value for the Base Offset. This will place the top of the slab two inches below the boundary you will be defining.
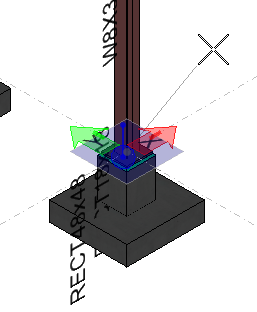
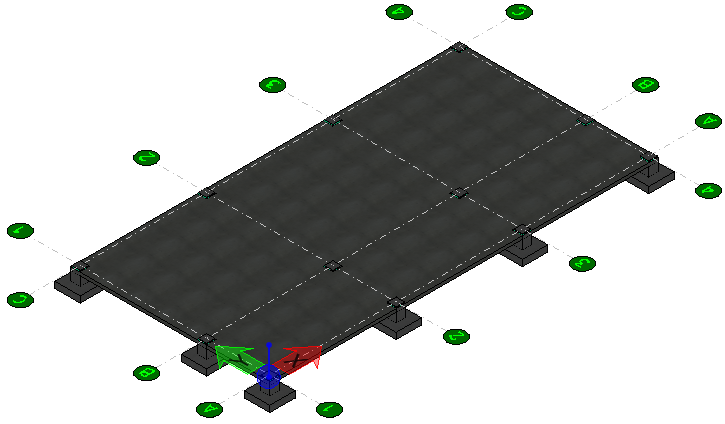
- Position the pointer near the bottom of the steel column at the A1 grid position. The Structural snap icon appears while the steel column is highlighted, immediately confirming that the exact location is selected. Enter a data point. The first slab boundary point is established at the bottom of the steel column. The slab boundary is dynamically previewed with the next placement point attached to the pointer.
- Repeat the previous step for the other three corners of your building (at grid positions A4, C3 and C1) Reset to complete the slab.
- Click Commit Changes to commit your changes to design history The Commit Changes text box appears. Enter your comments (such as Added slab to pedestals), then click OK.
-
Select the Show Design History tool.
The Design History dialog appears and is updated with your latest comments.